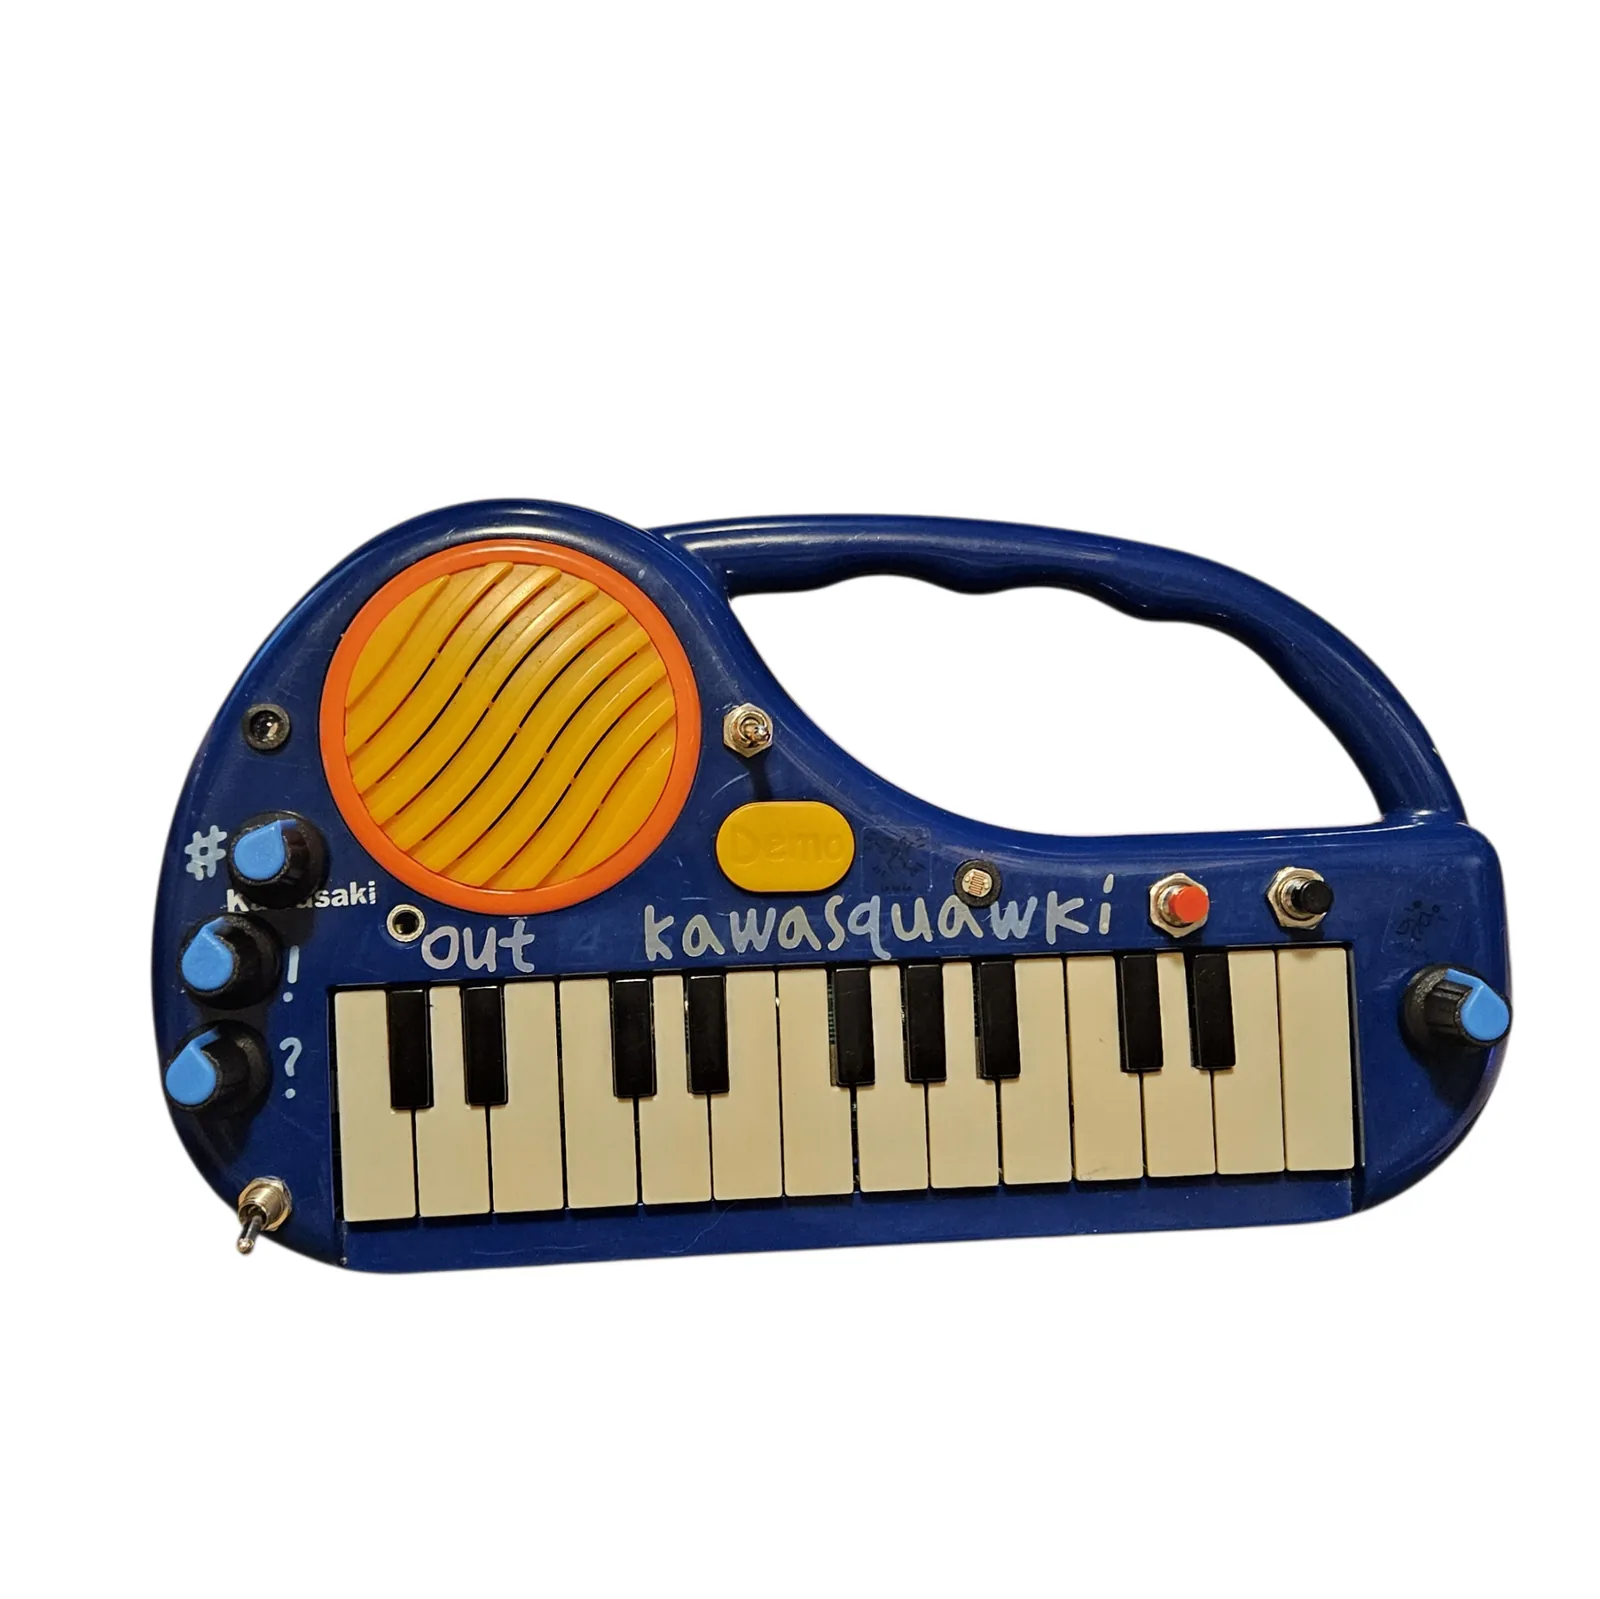
Oscillator and recorder in a toy keyboard · One of a kind
Kawasquawki
This keyboard was dead when I got to it, and not the fixable kind of dead. I tried. So rather than bin a perfectly good shell with a speaker and a handle on it, I built an Atari Punk Console inside, and then a recorder beside it. Play the oscillator, catch a few seconds of it, and play that back at whatever speed you want. Run both at once and it squeals and clicks over itself. The keys still do not play. Everything you hear comes off the knobs, the buttons and the light.
- TypeOscillator and lo-fi recorder in a toy keyboard shell
- CircuitsNE556 Atari Punk Console built dead-bug, plus an ISD1820 recording module
- Knobs* volume, ! pitch, ? shape, and playback pitch on the right
- ButtonsRecord and play
- SwitchesThree toggles, on/off. All three do something
- LightA photocell on the oscillator's pitch, and an RGB LED across the speaker
- BaseKawasaki toy keyboard, 25 keys. Its own circuit is dead
- OutputThe toy's own speaker, plus a 3.5 mm line out
- StatusOne of a kind. When it is gone it is gone
The oscillator
An Atari Punk Console is two oscillators in one chip, where the first gates the second. It is a stepped, stuttering, gargling square wave that sounds enormous for the number of parts in it. This one is an NE556 wired dead-bug: no circuit board, the chip on its back, every component soldered straight to its legs.
- * is volume.
- ! is pitch, which you hear as the speed of the stutter and the height of the note at the same time.
- ? is shape, the second oscillator, which decides what each pulse actually sounds like. This is the knob that takes it from a tone to a gargle.
- A photocell assists the pitch. Put a hand over it or turn it toward a lamp and the pitch follows the light, so you can play it without touching a knob.
The symbols are what is on the instrument. I labeled them that way on purpose and I am not going to pretend they mean anything.
The recorder
An ISD1820 module wired to the oscillator, with its own toggle to switch it on, a record button, a play button, and a pitch knob of its own. Hold record, play the oscillator into it, and you have a few seconds of it captured. Then play that back at whatever speed the knob is set to: slow it down into a groan, wind it up into a chirp.
The good part is that you can run both at the same time. The oscillator keeps going while the recording plays over the top of it, at a different pitch, and the two of them beat against each other into squeals and clicks. That is the sound this thing is actually for.
The light is an accident
There is an RGB LED wired straight across the speaker, so it is driven by the audio itself rather than by anything deciding what color to show. It changes with how much power is going through it, which means it flickers in time with whatever you are hearing.
What it does with that is pure luck. Switching the recorder on happens to drive it red. Running the oscillator happens to send it cycling through the whole range. I did not design either of those and I could not have planned them. It just turned out that way, and it is one of my favorite things about the instrument.
One thing to know before you buy it
The keyboard does not work as a keyboard. The keys press and nothing happens. The original voices, the rhythms and the Demo button went with the circuit that used to run them, which was beyond repair before I started. If what you want is a toy keyboard that plays, this is not it. What it is instead is an oscillator and a sampler that happen to live in a very good enclosure with a handle on it.
Demo
Demo filmed by Onion Madder on the actual unit.
Build either half yourself
Both circuits in here are written up as free guides on this site. The Dead-Bug Mosquito builds this exact NE556 point to point, with the parts list, every joint and what each knob does, and there is a breadboard version if you would rather not solder. The recorder has its own guide too: the ISD1820 breakout, which goes through all four of its modes and the wiring most write-ups skip.
So you can buy this one, or build both halves and put them in whatever dead thing you have got. Both are fine by me.