Sold · found a home
CD4046 VCO + Opto Duet · One of a kind
Bluebottle
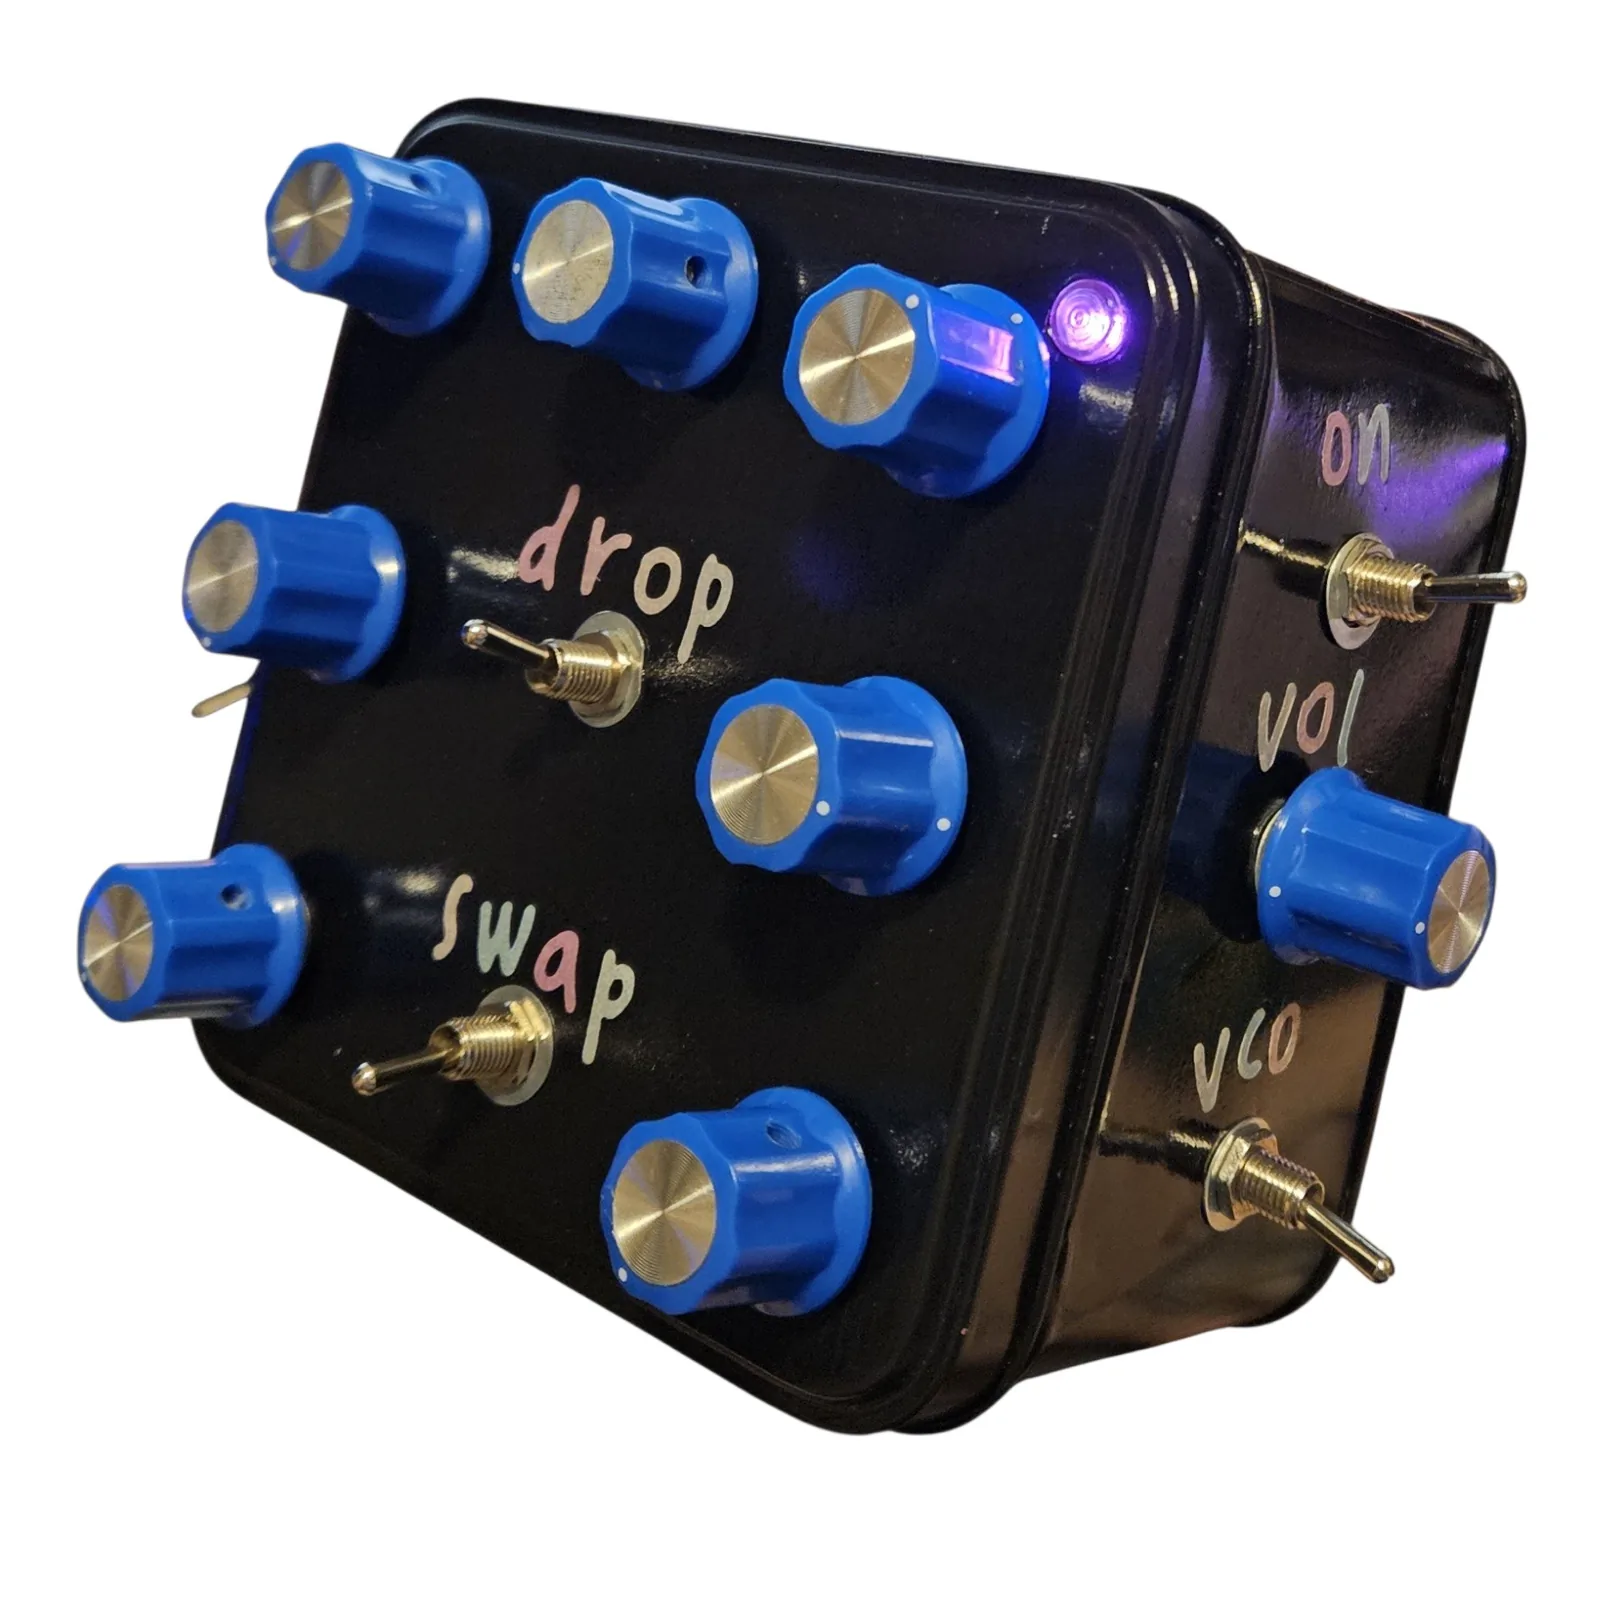
My Dragonfly VCO and my Opto Duet in the same small tin, wired into each other, painted black. Seven knobs and two toggles on the lid, a volume and two more toggles on the side, and a line in that still takes a guitar and does terrible things to it. Since the Opto Duet went in it buzzes and whines more than it drones, which is where the name came from.
- TypeTwo circuits in one box: a CD4046 phase-locked loop used as a VCO, and a pair of 555 timers coupled by light
- BoardsStripboard, from my own Dragonfly VCO and Opto Duet layouts (the two-555 one), both free guides
- ControlsSeven knobs and two toggles (drop, swap) on the lid; a volume knob and two toggles (ON, VCO) on the side
- Input3.5 mm line in on the top edge, into the VCO's loop input. A guitar in gets tracked and chewed
- Output3.5 mm line out on the top edge. VOL on the side is the volume for the whole box
- EnclosureA small square tin, painted black, blue knobs. A 5-foot-4 woman can palm it; that is my hand in the photo
- PowerRechargeable 15V battery inside. DC jack on the bottom, 15V center positive
- BuiltSeptember 2026
- StatusSold - found a home, October 2026
What it is
Two of my own stripboard designs sharing a tin. The Dragonfly VCO is a CD4046, a phase-locked loop that most synth builds use as a plain oscillator and ignore the rest of. Mine keeps the rest: there is an input, and when the loop is let off the leash it stops obeying the pitch knob and starts hunting for whatever you feed it. The Opto Duet is two 555 timers that only talk to each other through light - a slow one flashing an LED sealed against a photocell, which sets the pitch of a fast one.
In here the Opto Duet is wired into the Dragonfly rather than sitting beside it, with its own pair of knobs and its own toggle on the lid. Both boards are free guides on this site, and the bends on the Dragonfly - the octave drop and the UV LED that flickers with the pitch knob - are written up on its page. The violet light in the corner of the lid is that LED. It is a bend, not an indicator.
The controls, as far as I can tell you
The lid has seven knobs and none of them are labeled, and here is the honest reason: they ended up out of the positions I planned, and I do not remember which one went where. There is a power starve, a pitch, a couple more for the VCO, and two for the Opto Duet. Turn them and find out; that is how I use it.
The toggles are labeled. drop is the octave-drop bend from the Dragonfly, a toggle onto the chip's supply pin that pulls the whole thing down about an octave. swap swaps the oscillator speed inside the Opto Duet. On the side, ON is the power - the Opto Duet comes on with the box - VCO brings the Dragonfly in, and VOL is the volume for everything.
The line in
The Dragonfly's input survived the move into the tin, on a 3.5 mm jack on the top edge next to the line out. Plug a guitar into it and you get the crackly, crunchy sound of the loop trying to track a guitar and mostly failing, with the theremin sounds from the Opto Duet riding along on top of it. That is the whole box in one cable.
The tin
A small square tin I painted gloss black, with blue knobs, and it is small: a 5-foot-4 woman can palm it, which is why my hand is in one of the photos. This is the first tin I have painted over instead of leaving its own artwork on, and I will admit that is partly an experiment - I want to know whether a plain painted box sells differently from the pansies and the tea tins. So there it is.
It runs from a rechargeable 15V battery inside the tin, with a DC jack on the bottom: 15V, center positive. Nothing else goes in there. There is no speaker; it goes out through the 3.5 mm line out, the standard headphone size, to an interface, a pedal chain or an amp with a 3.5 mm to quarter-inch lead.
Demo
Demo video coming soon - it's on the bench being filmed.
Or build the boards yourself
Both layouts inside this are free. The Dragonfly VCO and the Opto Duet guides each have the stripboard drawing, the parts list, the netlist and the file you can open in Copper Bottom to check or change before you cut a strip. What they will not give you is how I wired the two into each other in here, because I did that on the bench at midnight and wrote none of it down.