Mosquito 556
The Atari Punk Console on an NE556, soldered down · Ten strips by eleven holes · By Onion Madder · Mess O' Pedals
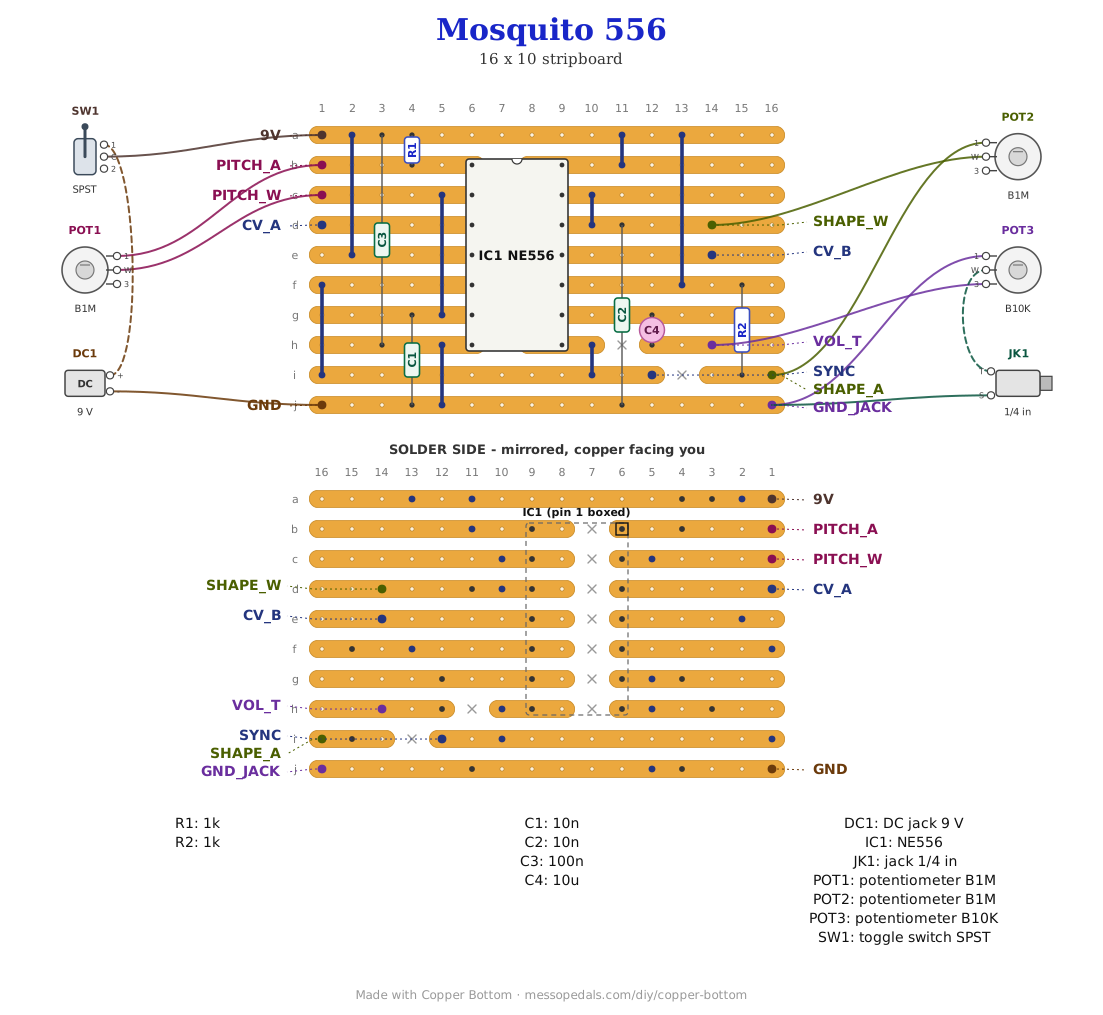
The Dead-Bug Mosquito is the one bug in the series that never got a permanent home - the Hive, Cicada, Grub, Dragonfly and Hornet all made it onto stripboard, and the noise box that started the whole thing did not. This is it: an NE556 as the Atari Punk Console, on ten strips by eleven holes, with the values from Paul In The Lab's two-555 APC - 470K pots, a 10n cap on the oscillator and a 100n on the one-shot. Timer A runs free, its output triggers timer B, and timer B's one-shot is the sound. The output leaves through a 10 µF cap to a volume pot, a CV jack bends the pitch through a 100K into pin 3, and the sync out keeps an empty pad so it can be added without a redraw.
What you'll need
tap to expand / collapse
- 1× NE556 dual timer, 14-pin DIP - spot it: NE556 on top, not 555; a notch or dot marks pin 1. Two 555s in one package, which is the whole trick of the circuit
- 3× 1K (brown-black-red, R1, R2 and R3) - R1 and R2 are the stops, one in series with each pot on the supply side, so a knob turned to the end never puts a discharge pin straight onto the supply. R3 is Paul's 1K, from pin 1 to pins 2 and 6. All three stand up
- 1× 100K (brown-black-yellow, R4) - the CV input, from pin 3's strip to the CV_IN pad. It stands up
- 1× 10n ceramic (103, C1) - timer A's timing cap, the pitch. It stands left of the chip, near the bottom
- 2× 100n ceramic (104, C2 and C3) - C2 is timer B's timing cap, running from the right of the chip up to the top strip; leave its leads long. C3 is the supply decoupling, standing between the top two strips in the corner
- 1× 10 µF electrolytic (C4) - the output DC blocker. Spot it: stripe marks the negative leg. Its plus goes on pin 9's strip; it stands up
- Stripboard, 10 strips × 11 holes or larger, and solid wire for eight links. J3 and J4 run under the chip, so they go in before the chip
Off the board
- 2× 470K pots - pitch and shape, Paul's value. Wired as variable resistors: the wiper and one outer lug, the third lug left empty. Their 1K stops are on the board. Mine has 500K, and it works
- 1× 10K pot, the volume - spot it: B10K. Wired as a divider: all three lugs. Lug 3 to VOL_T, lug 1 to GND_JACK, wiper to the jack
- 1× 1/4″ jack for the output - or a small 8 Ω speaker straight off the volume wiper, the way the dead-bug build plays
- 1× 1/4″ jack for CV in - tip to CV_IN, sleeve to GND_JACK
- 1× SPST toggle for power, in the positive leg between the DC jack and the 9V pad
- 1× DC jack or 9V battery snap - a 9V battery, or at least two vape cells in series
- An upright 125B - the drill template further down
The layout file is the guide
Like the 555 theremin and the Opto Duet, the build document for this one is the file itself: ↓ Download Mosquito_556.json - import it into Copper Bottom and the editor gives you the board picture, the placement walkthrough, the electrical checks and a printable build sheet, all from the same file. No coordinates are written out on this page on purpose: the editor is the viewer, and a number typed twice is a number that can drift.
Strip a is ground and strip b is V+, so the decoupling cap stands between them, and J1 takes ground down the column beside the chip to pin 7. Strip j is the trigger bus. Timer A's output leaves pin 5 on the left of the chip and timer B's trigger is pin 8 on the right, and no single strip joins them - so J6 takes OUT A down the left edge to strip j and J7 drops pin 8 straight onto it. The SYNC pad sits at its right end. Four cuts away from the chip make the pad islands: PITCH_A at the left end of strip a, CV_IN at the left end of strip f, SHAPE_A and VOL_T at the right ends of strips f and i. On strip f the cut under the chip sits one hole further right than the rest, so J3 lands on pin 4's side.
Pin 11 is left open, the way Paul leaves it on his board, and there was no hole left for a pad on it. Copper Bottom's checks flag it as an orphan, a strip with one thing on it; that warning is expected here.
The netlist
Quoted verbatim from the layout file. It was written from the board, so checking the board against it can only pass - what it is for is carrying the circuit somewhere else, and telling you what each strip is supposed to be doing while you stare at it.
The off-board wiring
Ten pads leave the board. One of them, SYNC, is for an extra and stays empty on the base build.
| Pad | Goes to |
|---|---|
| 9V / GND | The supply. 9V through the power toggle from the DC jack or battery snap; GND to the jack's sleeve or the snap's black lead |
| PITCH_A / PITCH_W | The pitch pot, as a variable resistor: one outer lug to PITCH_A, the wiper to PITCH_W, the third lug empty. PITCH_A is the end of R1, the stop from V+; PITCH_W is pin 1. Which outer lug decides which way the knob turns; swap them if it feels backwards |
| SHAPE_A / SHAPE_W | The shape pot, the same way: one outer lug to SHAPE_A, the end of R2, the wiper to SHAPE_W, on pins 12 and 13, the third lug empty |
| CV_IN | The CV jack's tip. R4 on the board takes it on to pin 3. The jack's sleeve goes to GND_JACK |
| VOL_T | The volume pot, lug 3 - the top of the divider. The output arrives here through C4 |
| GND_JACK | The volume pot's lug 1 and both jacks' sleeves. The volume wiper goes straight to the output jack's tip and never touches the board |
| SYNC | Empty. Timer A's raw output at the pitch rate, a short drop once a cycle rather than an even square on these values - a 1K to a jack tip makes it the clock out the dead-bug page describes |
Built, and heard
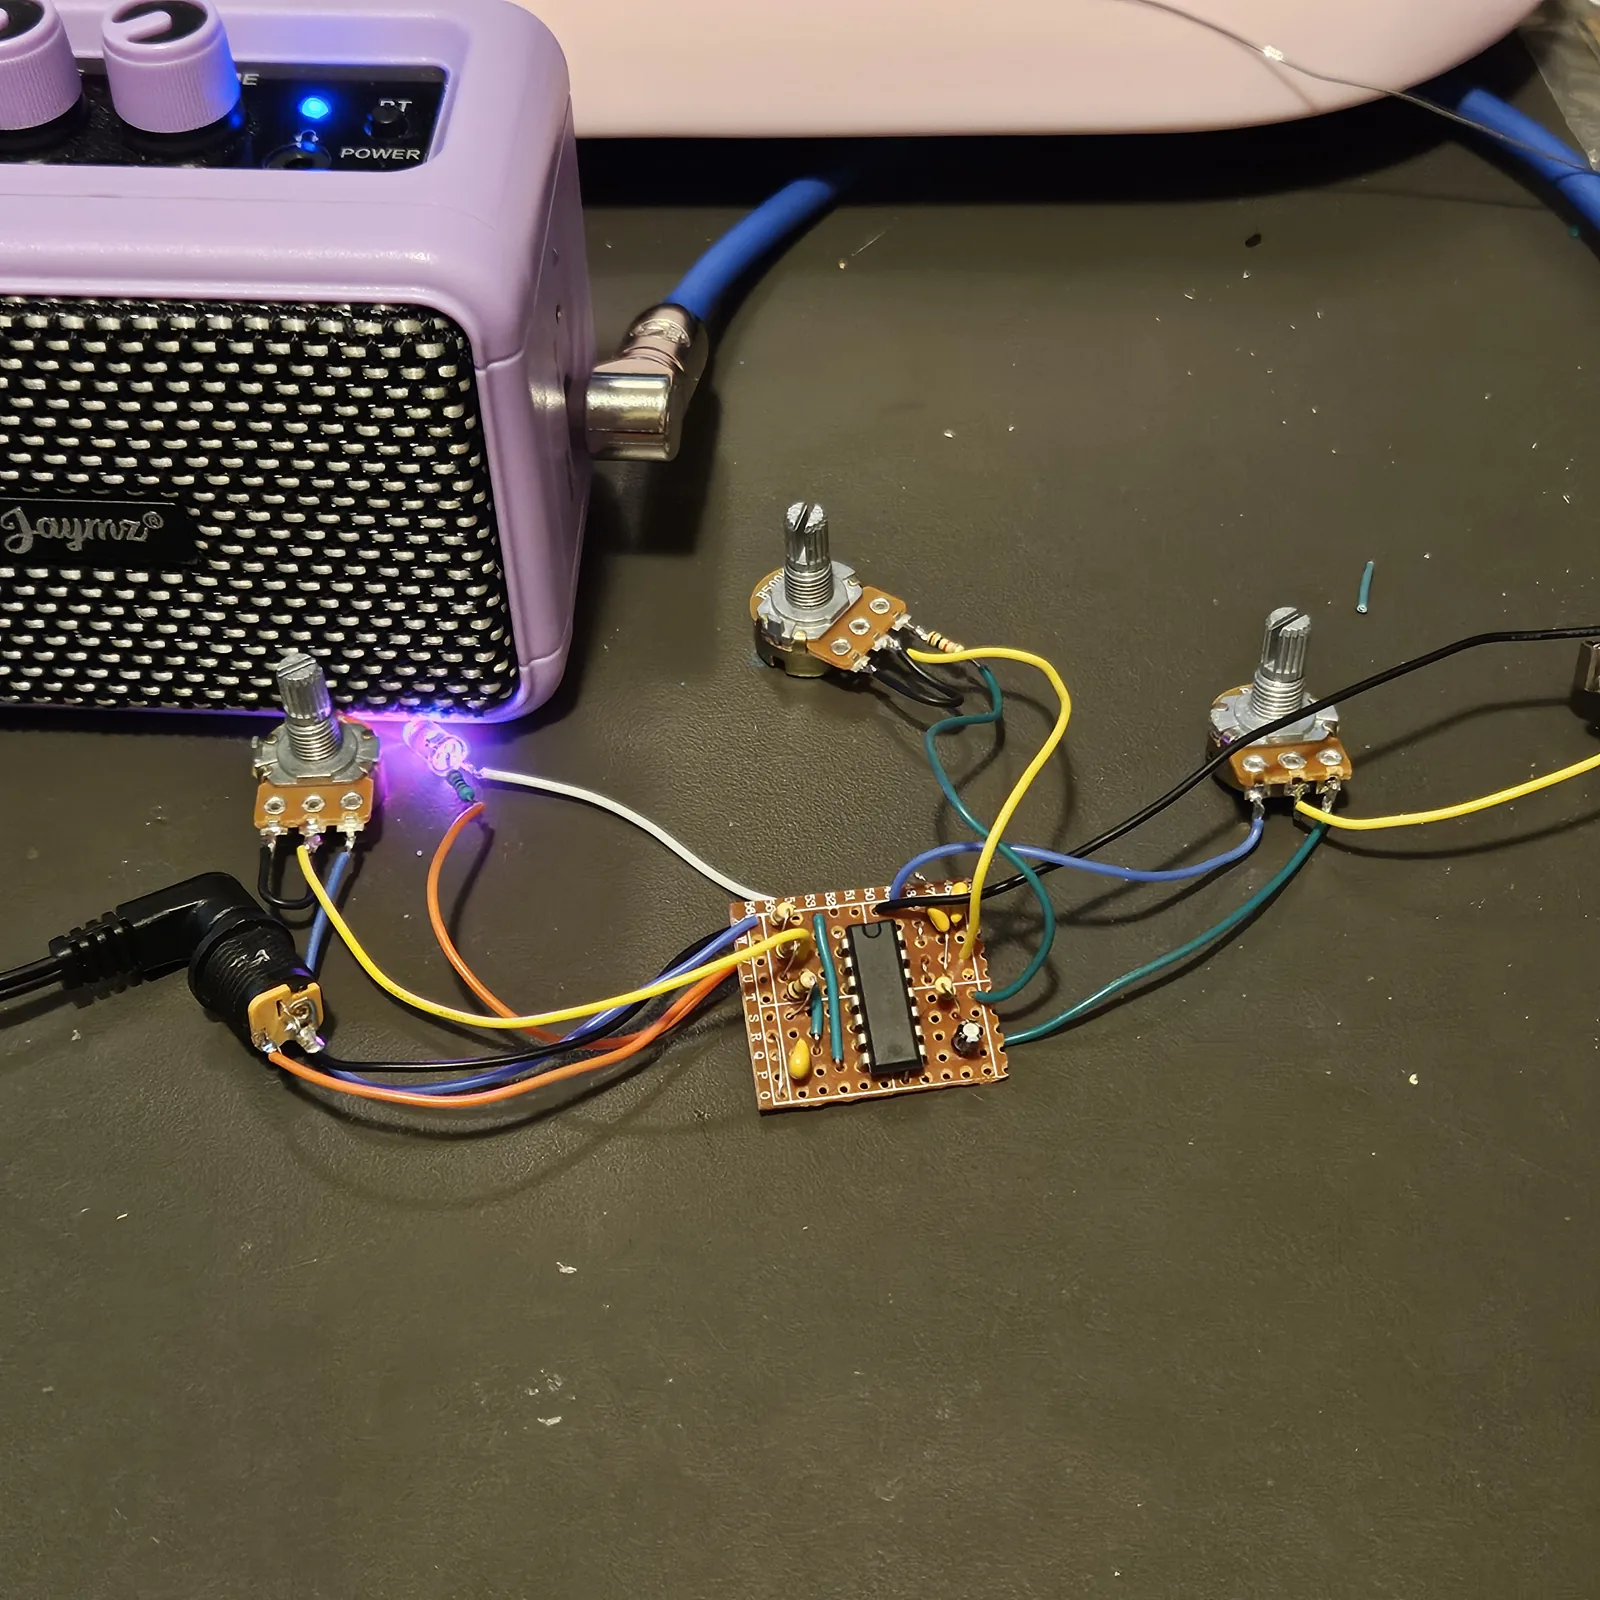
The first board, 10 strips by 16, was built on the bench in September 2026 straight off its file, kept here as Mosquito_556_v1.json, and it works. That board has 1M pots, 10n on both timers, the fixed 1K on the supply side of the pitch pot and no CV jack. In the photo every off-board part is still on flying leads: the three pots, the toggle and the jack. The lit LED is not in the layout file and the pad table above does not describe it. Not boxed yet.
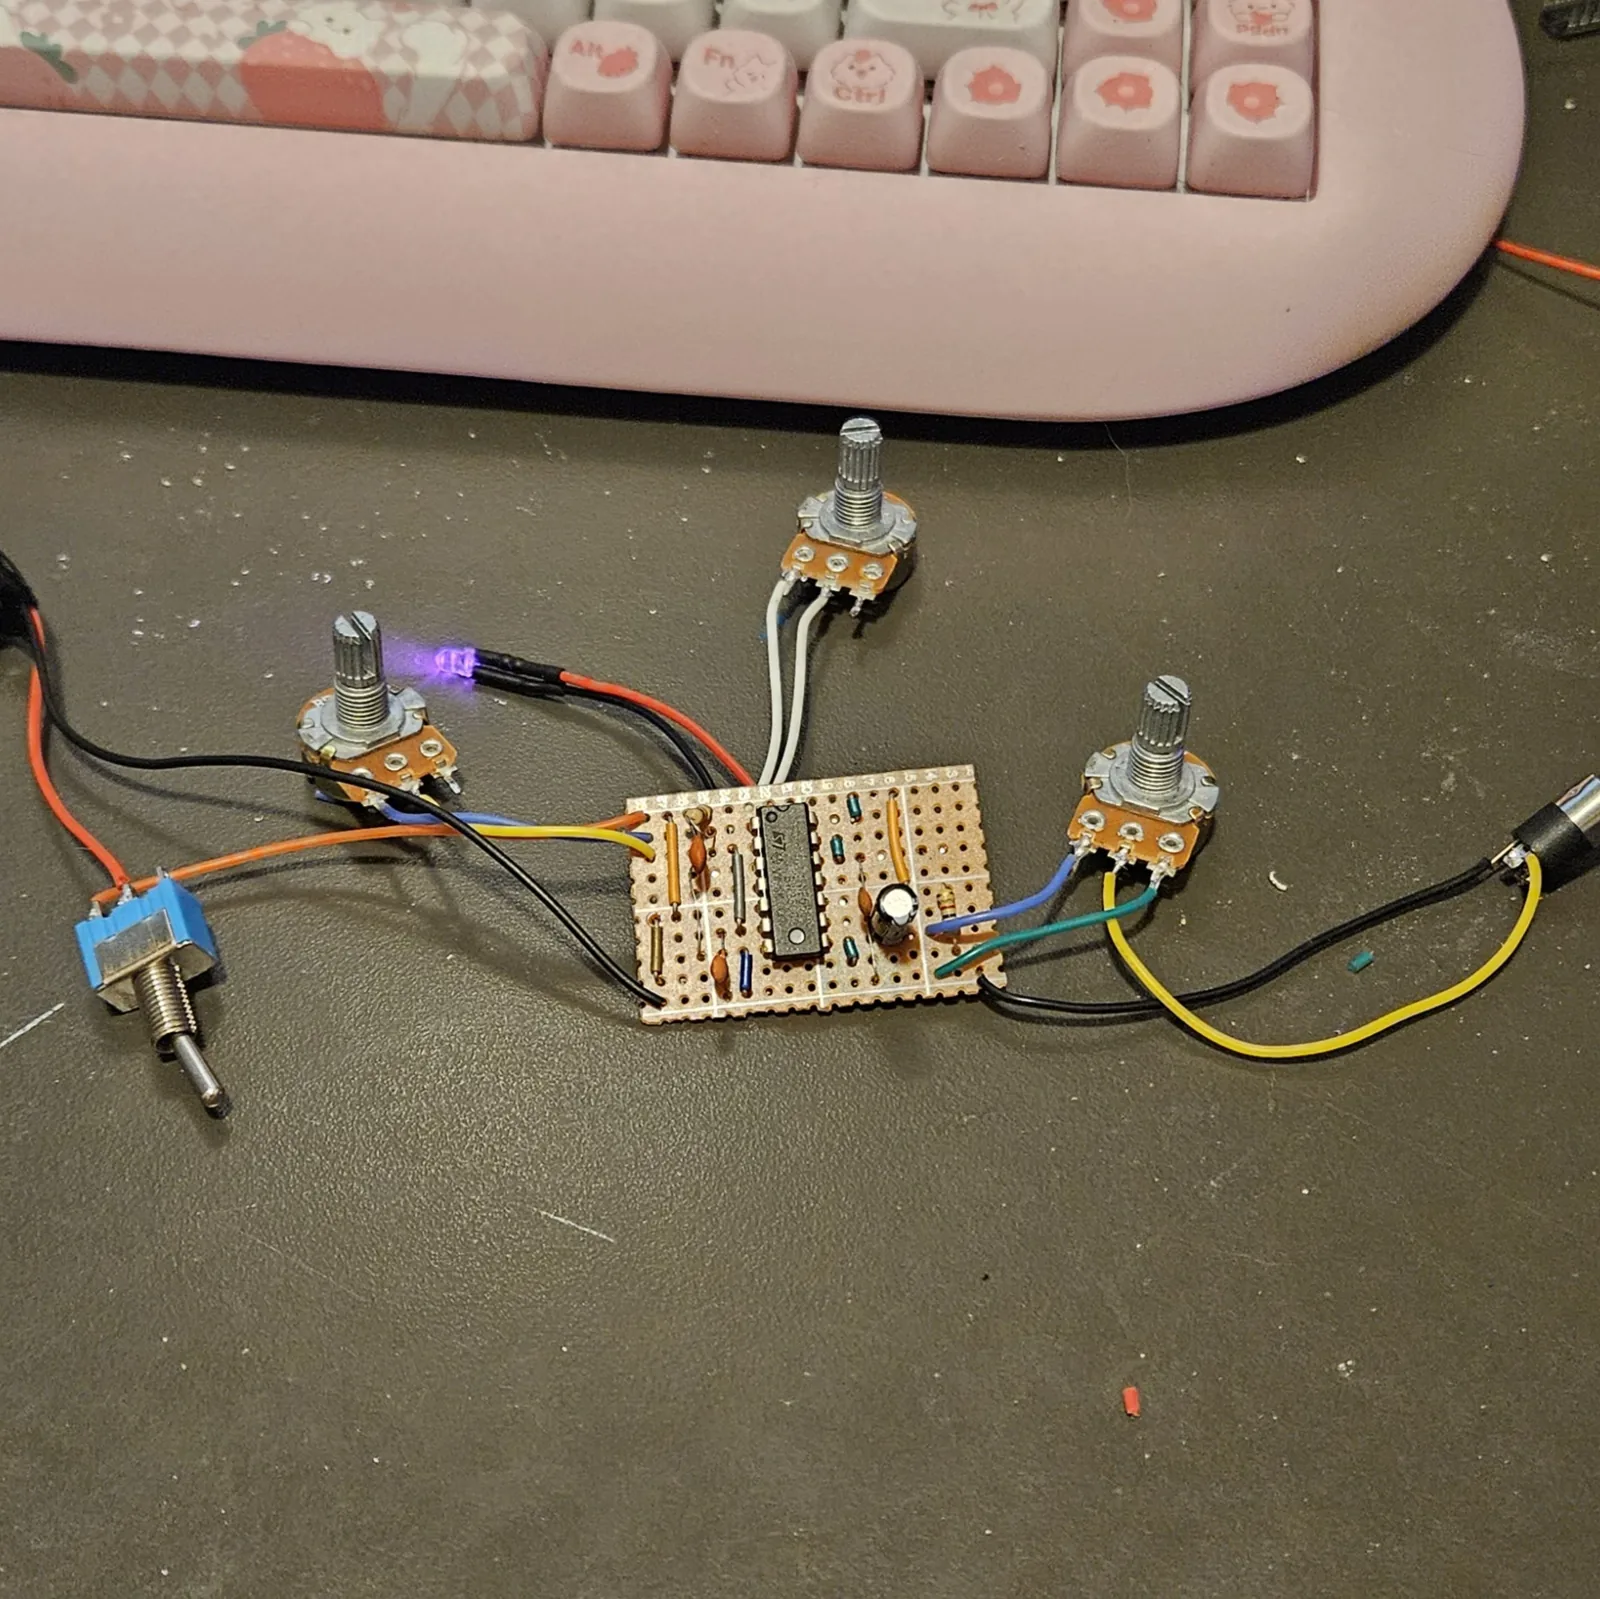
I built the 10 by 11 revision above too, in October 2026, and it works: it sounds like an APC. I used 500K pots for pitch and shape instead of the 470K the file asks for, and added an LED, which is not in the layout file: a 2.2K from power to the LED, and the LED to ground. The power switch is left out for now, and the CV jack is not fitted yet, so the CV input is untried.
↓ Same box, jacks on top (PDF)
The second sheet keeps every control where this one has it and moves the jacks - power, CV and audio - to the top wall, so the cables leave upward. Two ways to drill one box; pick one.
Drawn for the layout file's parts and nothing else: pitch, shape and volume down the left, the power toggle and the CV input on the right, DC and the output jack along the bottom. Nobody has drilled this one yet.
Print at 100% / “Actual size”, never “Fit to page” - check the bar measures exactly 4″ before you touch a drill. The face is 66 by 121 mm but only 42 mm of it is drillable once the lid lip is clear, which is why everything sits in a column.
How it works, in one breath
Two timers, one chasing the other. Timer A is an astable: the pitch pot, R1 and R3 charge C1 toward two thirds of the supply, then the timer discharges it through R3 alone, back to a third, and around it goes at a rate the pitch pot sets. Charging goes through the whole pot and discharging only through the 1K, so pin 5 sits high for most of each cycle and drops for a moment - and that short drop is what timer B wants on pin 8, its trigger. Timer B is a monostable: every time the trigger falls it puts out one pulse whose width is R2 plus the shape pot charging C2, and then it waits for the next fall. When the pulse is shorter than the pitch period you hear the pitch; when it is longer, timer B misses triggers and you hear the divisions and the beating between them, which is the Atari Punk Console's whole personality. C4 takes the DC off pin 9 and the volume pot hands what is left to the jack. A voltage on pin 3 moves the two levels timer A charges between, so the CV jack bends the pitch. R4, at 100K, means a source plugged into the jack nudges pin 3 rather than taking it over.
The stops are not optional. Each pot runs from the supply to a discharge pin, so at zero ohms the timer's discharge transistor would pull the supply straight to ground once a cycle. R1 and R2 are the floor under the knob, which is why each pot is wired as a two-lug variable resistor and not a divider. R3 is a different job: it is Paul's, and the oscillator needs it at every setting, because C1 discharges through it.
Things to try
None of these have been tried on this board.
- Sync out. A 1K from SYNC to a jack tip is timer A's clock, to run the Grub or the Spider off this box
- A second one-shot. The dead-bug page's NE555 voice 2 hangs off the same trigger; SYNC is that node, so it wires up from the pad
- Other timing caps. A bigger C1 pushes the pitch down into clicks and rhythms, a smaller one (1n) up into whistles; C2 does the same to the one-shot's width
- The first board's values. 1M pots and a 10n for C2, what the built board in the photo runs, fit this layout part for part. The oscillator would still be wired Paul's way
Circuit is Forrest Mims's Stepped Tone Generator, the Atari Punk Console. The values on this revision are Paul Stevenson's, from his two-555 Atari Punk Console layout on Paul In The Lab; the stops, the CV input and the layout are Onion Madder's, drawn in Copper Bottom. The first board followed the Dead-Bug Mosquito.