Spider Sequencer PCB
CD4017 + NE555 on a 74 by 82 mm printed board · By Onion Madder · Mess O' Pedals
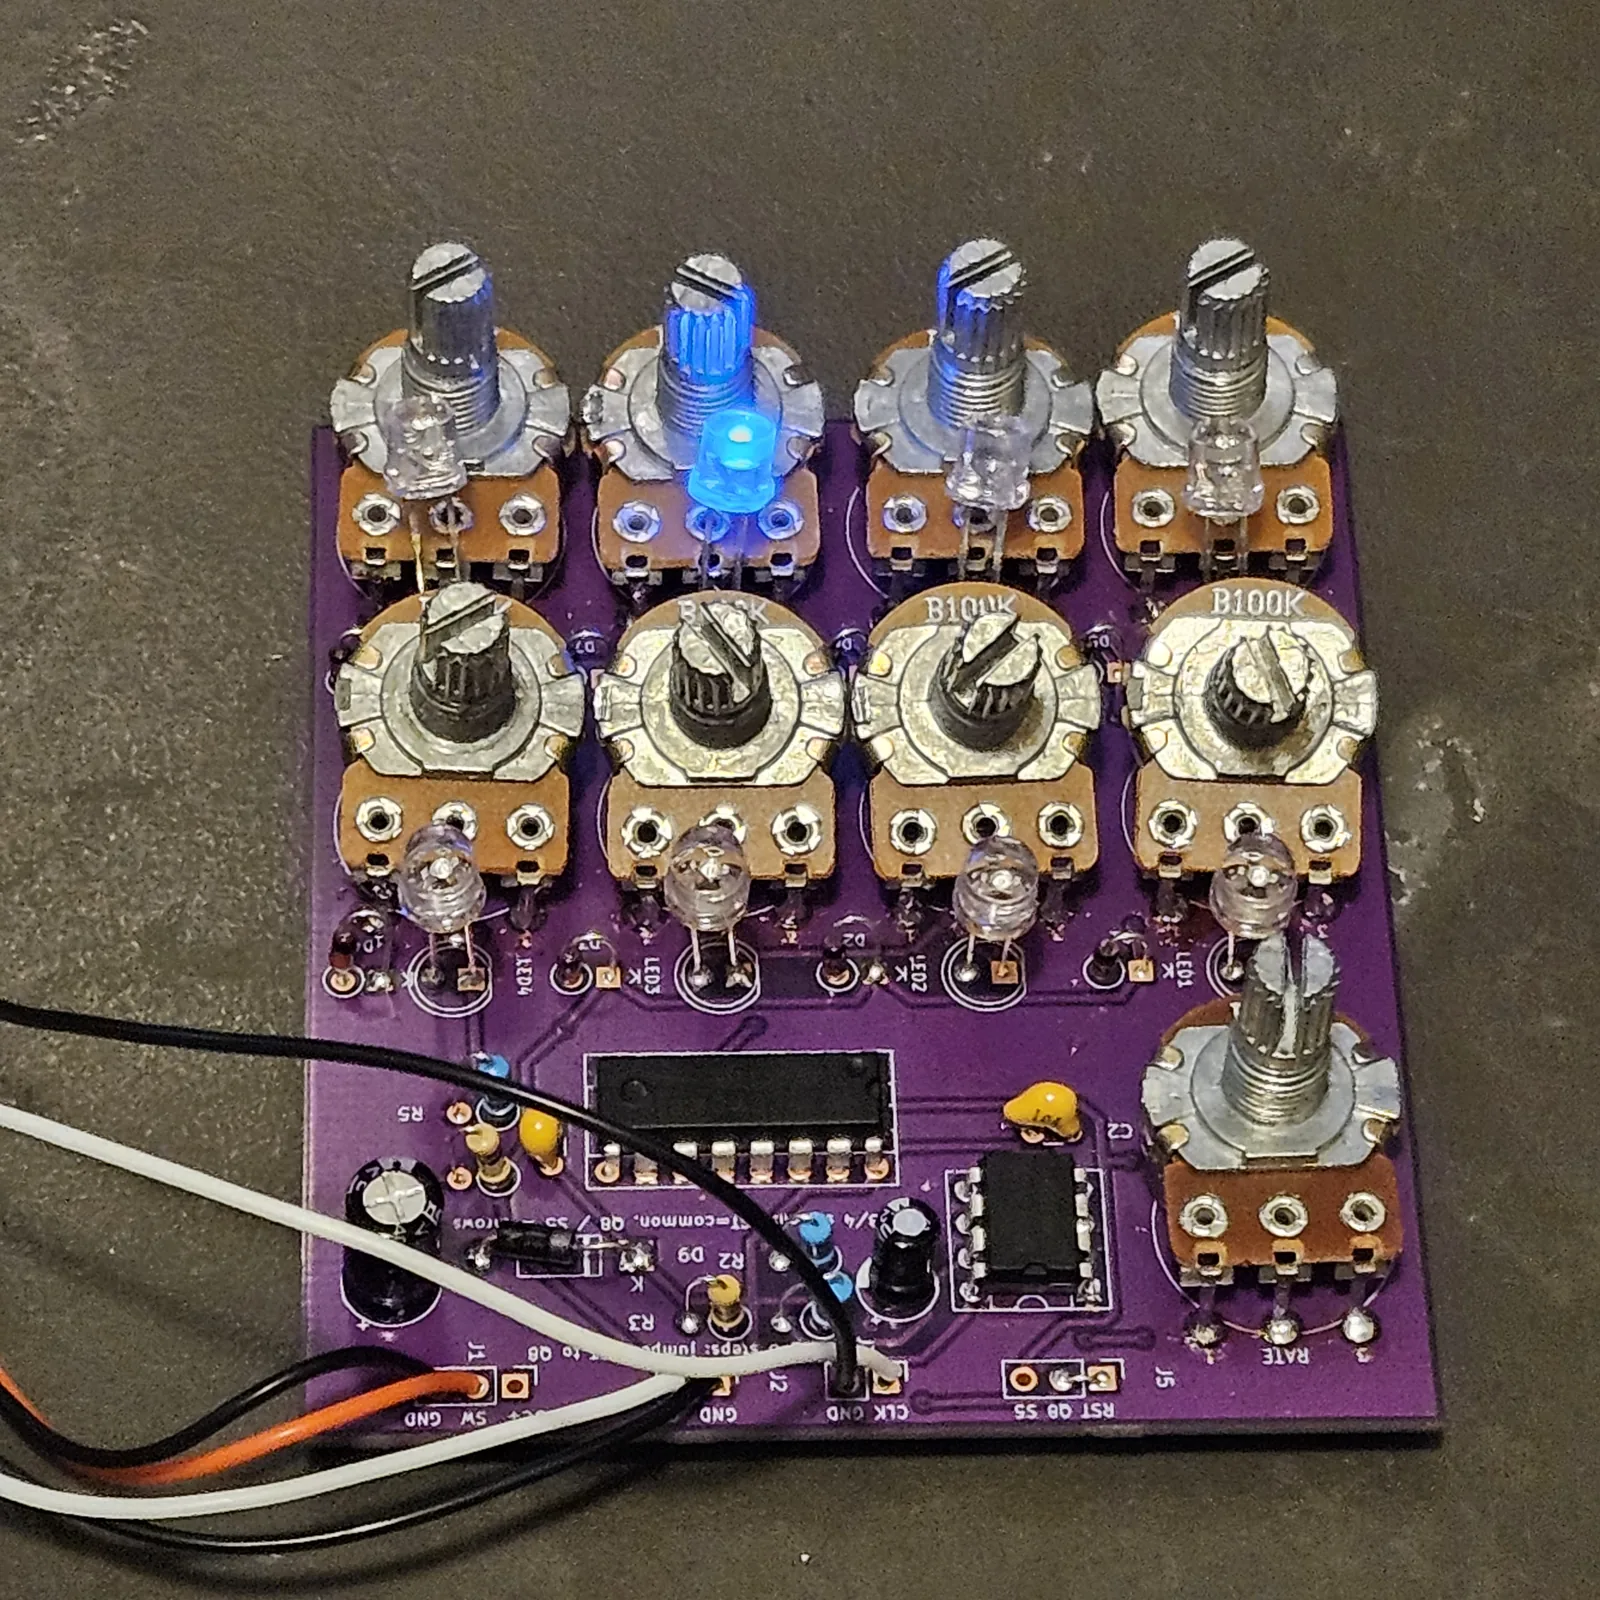
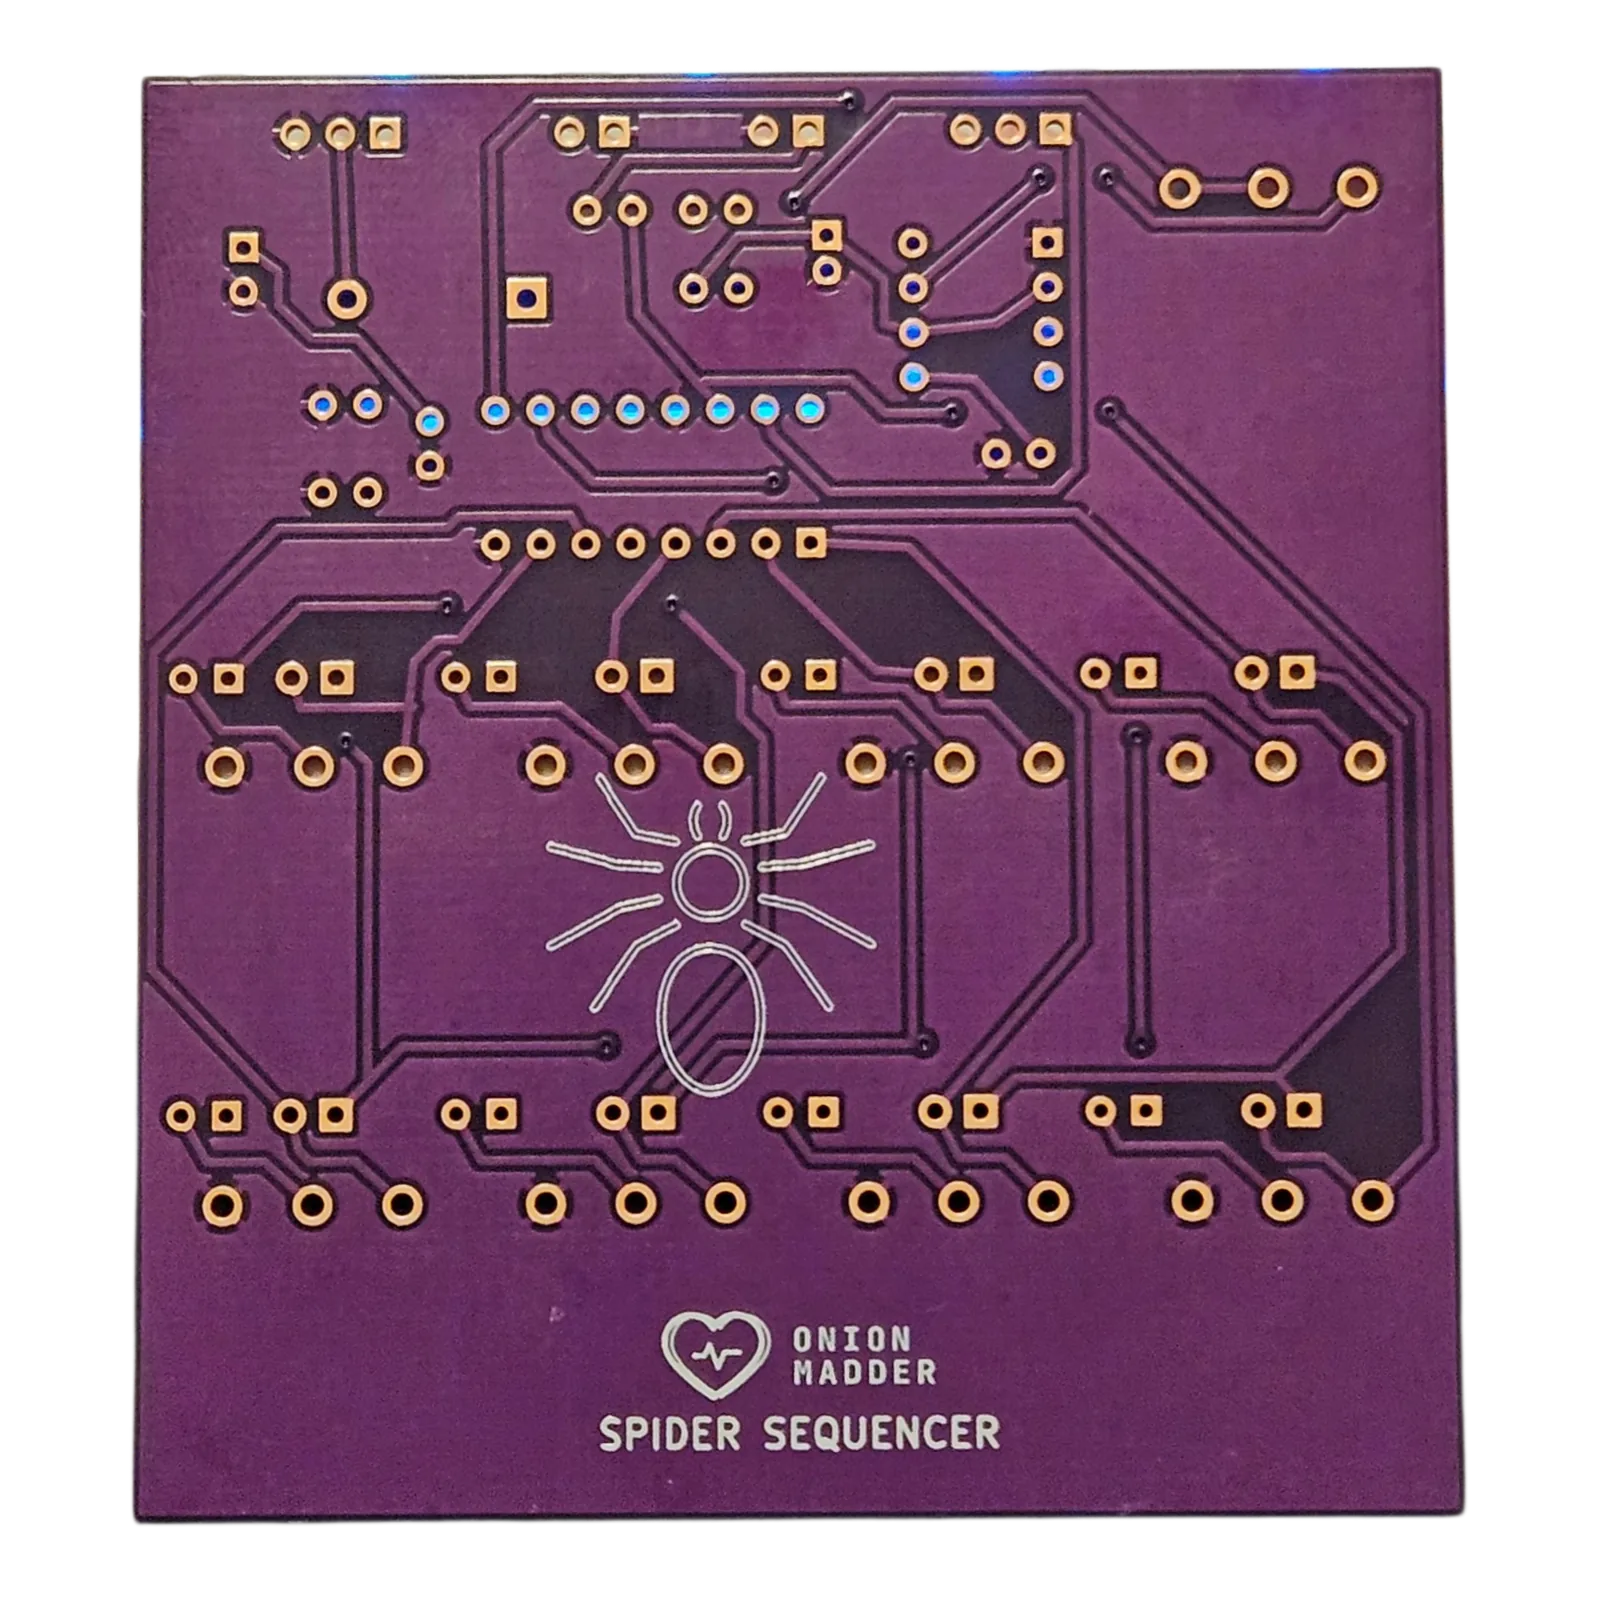
The Spider Sequencer on a printed board. A 555 clocks a CD4017 through eight steps, each step has its own knob and its own LED, and the eight knobs share one CV output through a diode each. All nine pots and all eight LEDs solder straight to the board.
What you'll need
tap to expand / collapse
37 parts on the board. The numbers in brackets are the ones printed beside each part's outline. ↓ Download the parts list (PDF), one page to print for the bench and tick off as each part goes in.
- 1× CD4017 (U1) - spot it: CD4017 printed on top, a notch or dot marks pin 1. The counter. The 16-pin one, not a 4022
- 1× NE555 (U2) - spot it: NE555 printed on top, a notch or dot marks pin 1. The clock
- 2× 10K resistor (R1, R2) - spot it: bands brown-black-orange. The clock's upper timing resistor and the RATE pot's floor
- 1× 1K resistor (R3) - spot it: bands brown-black-red. On the clock output
- 1× 100K resistor (R4) - spot it: bands brown-black-yellow. Holds the CV bus down
- 1× 2.2K resistor (R5) - spot it: bands red-red-red. The one resistor all eight LEDs share
- 2× 100nF ceramic (C2, C4) - spot it: printed 104. One on the 555's control pin, one across the supply
- 1× 2.2 µF electrolytic (C1) - spot it: a can with a stripe down the minus leg. The long leg goes in the square pad, marked +. The clock's timing cap. A 1 µF runs twice as fast, a 4.7 half as fast
- 1× 100 µF electrolytic (C3) - spot it: a can with a stripe down the minus leg. The long leg goes in the square pad, marked +. Across the supply
- 8× 1N4148 (D1, D2, D3, D4, D5, D6, D7, D8) - spot it: tiny glass body, black band. The band goes to the square pad, the end the board marks with a band and a K. One per step, each step's knob onto the CV bus
- 1× 1N5817 (D9) - spot it: black body, gray band. The band goes to the square pad, the end the board marks with a band and a K. Reverse-polarity protection on the supply
- 8× LED (LED1, LED2, LED3, LED4, LED5, LED6, LED7, LED8) - One per step. They share one resistor, so make them all the same color or the brightness wanders step to step. The short leg, on the flat side of the rim, goes in the square pad
- 8× B100K pot, 16 mm, board mount (RV1, RV2, RV3, RV4, RV5, RV6, RV7, RV8) - The steps, RV1 first. Spot it: the B is the linear taper.
- 1× B1M pot, 16 mm, board mount (RV9) - RATE. Spot it: the B is the linear taper.
- 1× Spider Sequencer PCB
Off the board
- 1× DC jack and a 9V supply, center negative
- 1× SPST toggle for power, between the DC jack's + lug and SW
- 2× 3.5 mm mono jacks, CV out and clock out
- A wire link for J5, or an on-on toggle (SPDT, no center-off) for eight or four steps
- Hookup wire for the headers
What is different from the stripboard
- The step count is a header, J5, and it must never be left open. RST on J5 is the 4017's RESET pin and nothing else on the board holds it. Left open, it floats and the sequence sticks on step 1, which is what my stripboard build did until a link went in. For eight steps, solder a wire link from RST to Q8. For a switch, use an on-on toggle, common to RST, the two throws to Q8 and S5: Q8 runs eight steps and S5 runs four. Never a center-off toggle.
- Everything else is the stripboard circuit, part for part and value for value, with the pots and LEDs moved onto the board.
The headers
Everything that leaves the board leaves from a header along the top edge, and each one has its pins labeled on the board.
| Header | Pins | Goes to |
|---|---|---|
| J1 | DC+ / SW / GND | Power, wired the usual way: the DC jack's + lug to one lug of the power toggle, the toggle's other lug to SW, and the jack's - lug to GND. On a center-negative supply the + is the jack's sleeve lug and the - is its center pin. SW is the board's power input, through D9, which guards against a supply plugged in the wrong way around. DC+ connects to nothing on the board: it is a spare pad to join the jack's + and the toggle on, if that is easier, and it can stay empty. The note printed on the board, power toggle between DC+ and SW, means the same thing |
| J2 | GND / CV | The CV output jack: tip to CV, sleeve to GND |
| J3 | CLK / GND | The clock output jack: tip to CLK, sleeve to GND |
| J5 | RST / Q8 / S5 | The step count. A wire link from RST to Q8 for eight steps, or an on-on toggle with RST on its common. Never leave RST open |
Building it
- Lowest parts first, so the board sits flat on the bench while you solder: resistors, then the diodes, then the small ceramic caps.
- Before any chip goes in, power it up once. Fit the DC jack and the power toggle on their header, switch on, and put the meter's black probe on a GND pin and the red one in U1's pin 16 hole, from the top. You want the supply, less about 0.2V for the diode. Nothing there, or the full supply with the leads reversed, means look at the diode's band before going on. Switch off.
- The chips (U1, U2), soldered straight in. Pin 1 goes to the square pad, the end the board marks with a notch.
- The electrolytics, long leg in the square pad, marked +, then the LEDs and photocells. The ones with a hole in the face (LED1, LED2, LED3, LED4, LED5, LED6, LED7, LED8) stand on their full legs, so their tops reach about 12 mm up to that hole: tack one leg, offer the board up to the drilled face, set the height, then solder the rest.
- The pots last. Push each one flush to the board and keep its shaft square before you solder the first leg; a crooked pot is a hole that will not line up.
- Or the pots on wires. The board is drawn for 16 mm board-mount pots, but depending on the pots you have, they may not sit right on it: different legs, a different body, or a shaft that will not reach the face. Then put them on short wires, one from each pad to the lug in the same place, so the knob still turns the right way. Off the pots, the board no longer hangs on them, so it needs another way to sit in the box, and the pot holes are yours to place.
- The headers. Wire them to the jacks and switches in the table above.
The board hangs about 12 mm behind the face on its pot bodies, so anything on it taller than that, usually an electrolytic, gets laid over flat before the board goes in.
Print at 100% / “Actual size”, never “Fit to page”, and check the bar measures exactly 4″ before you touch a drill.
Nobody has drilled this one yet. Fit the pots to the board, offer the board up to the sheet, and check it against your own parts before you make a hole.
Circuit from the Spider Sequencer stripboard guide, every part value taken from its layout file. Board by Onion Madder.